Rebuilding BMW R75/5 of 1972
|
|
|
|
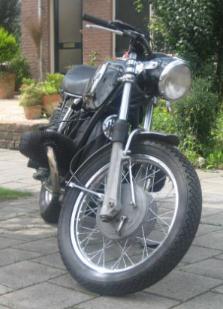
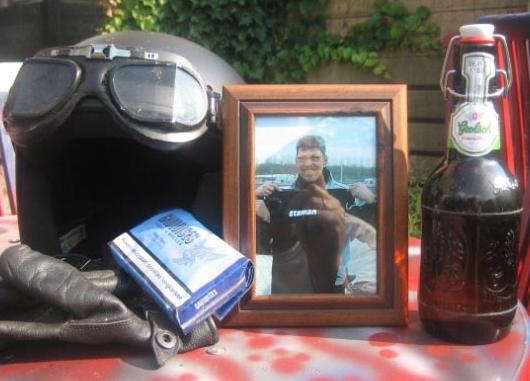
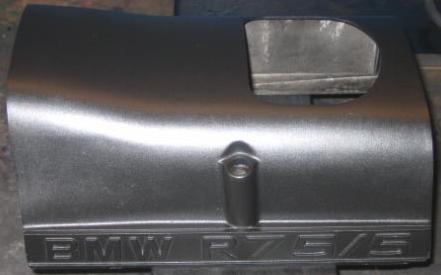
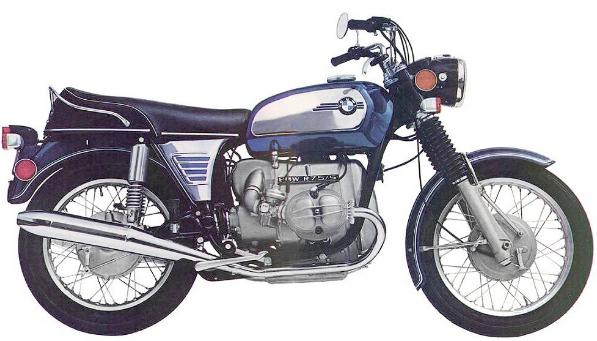
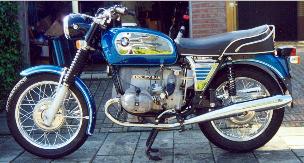
The blunt axe goes in, the knot will be cut, the BMW gets a true metamorfosis. Direct and indirect reference to this, is the loss of my mate Hans, to you also known as Etaman. Hans was always strongly present, through the years we built a strong bond. Hans was always there, when there was something that had to be tinkered. Hans was always there when riding the bike. Hans rode the BMW while I rode the Liberator. To keep my memory to Hans alive and in honour, I've decided to give the bike a total new look. Right after his death, I'd already decided that the bike should have the right sound. The neighbourhood and Assen will know, that he won't be forgotten by the ones that have known him, he will live on in our memory. Standard design: |
 |
|
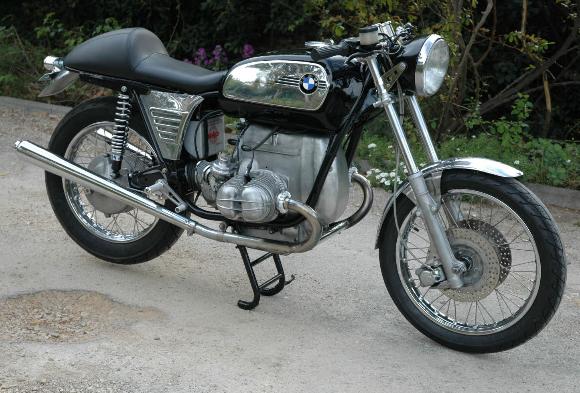
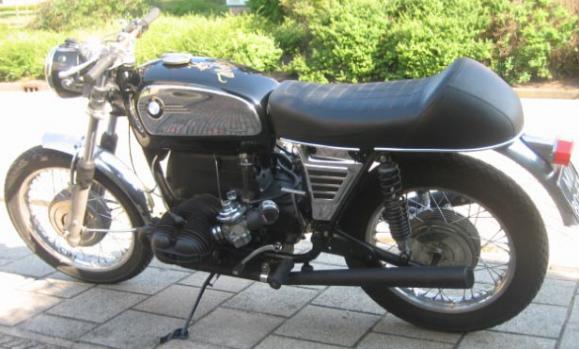
What do I have in mind??????? : |
 |
|
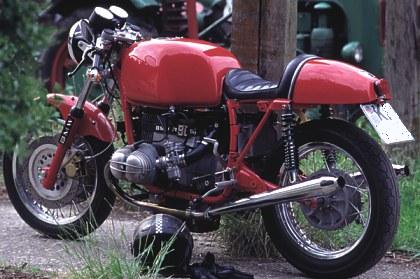
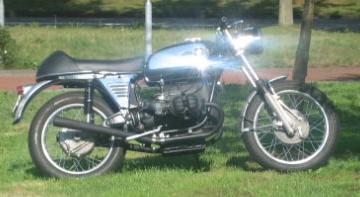
Something like this, but no disc brakes at the front, exhaust system mat-black. Probably the engine-block in mat-black as well. Nicked the pic from the internet.
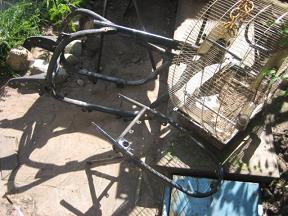
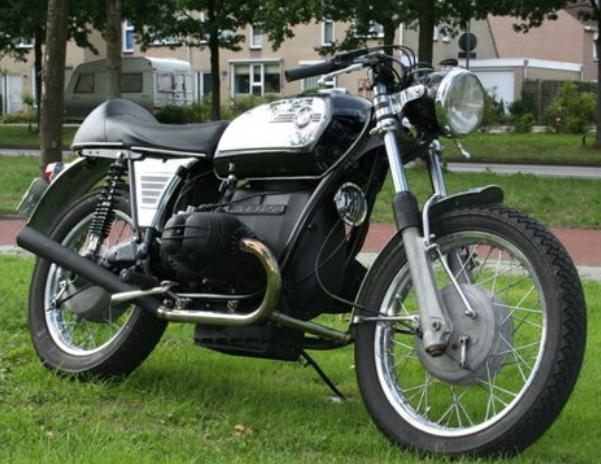
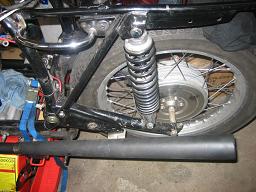
The beginning:Other exhausts: |
|
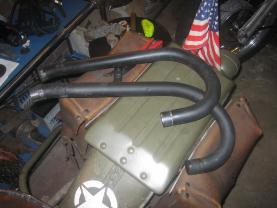
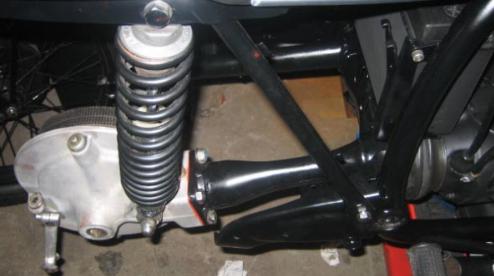
The whole idea is, to rebuild the bike, but make it possible to undo it as well and take it back to its original state. The original "cigar"-mufflers will be mounted on, I have "megaphones" in mind, in order to create the original "race-sound" of yesteryears. By chance I could get some megaphones in its crude form at Piet Bremer. He had them made years ago for the Moto Guzzi sidecar-combination, that he used to race in the seventies. The mufflers were a bit too long, so I took the flex grinder and made them more into proportion with the bike. The mufflers were completely open, at idle running it sounded like a tractor, opening the throttle however created quite a noise, but what a beautiful sound. |
|
|
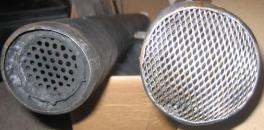
In the back of my head, the thought came, that the police probably would like the sound as well and might find it somehow deafening. Better mount a silencer in them. Now the sound is acceptable, but still beautiful in the higher range and while picking up speed. |
|
In the back of my head, the thought came, that the police probably would like the sound as well and might find it somehow deafening. Better mount a silencer in them. Now the sound is acceptable, but still beautiful in the higher range and while picking up speed. Unfortunatly, while working off my feelings, on the engine, I destroyed the gearbox. The 2nd gear was totally broken. From the loose cogged wheel, 3 teeth had broken off and from the drive-shaft 1 tooth was missing. Luckily for me this happened here in town, could get home allright with a blocked wheel now and then. Loose parts are hard to find, so I decide the find a second-hand one. Placed the question on the Moroforum and within a few hours I had an adress for an affordable used gearbox. In this case I should mention the name of JanBMW. Good tip! |
|
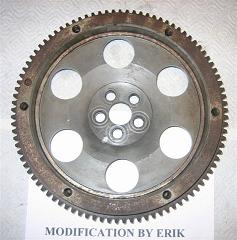
So I drove off to Friesland, searching for the village of Burum. Here I find a gearbox at Thijs. Had another look around, because he had more parts laying around that might come in handy: set of used bend pipes, a flywheel that could be made to cheese with holes, short rubbers for the forklegs. I can move on for a while. All I need to find is someone that can make those holes in it. I end up at Erik, again after a tip from JanBMW. Jan had seen Erik in Roden at the Eggrun 2006, seems to be quite a BMW-fanatic as well. Flywheel in the saddlebag and off to Erik. He really lives at the end of the world, I almost ended up in the barbed wire. Accidently also a Liberator-admirer, has such a bike for 20 years. I stayed quite a while and left the flywheel behind for further treatment. I wonder what it is going to look like and what it will do to the engine. |
|
|
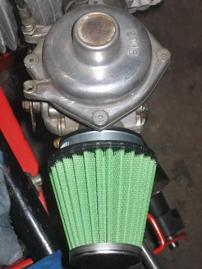
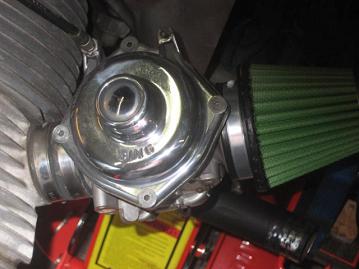
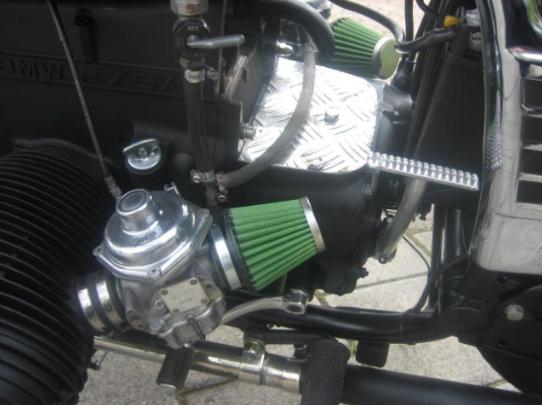
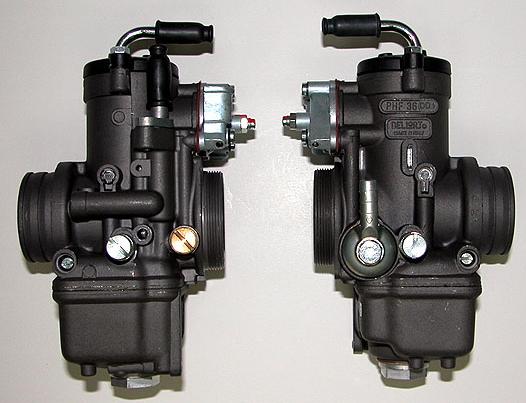
Back to Assen to grab a bite and then I move on to HMI Italiaanse motoren in Kiel-Windeweer. Haven't been here before and I was amazed. Lots of classic stuff, amongst wich MV Agusta, Moto Guzzi obviously, Benelli, Aermachi and that kind of stuff. Asked some info about different parts, most important were the carburators of the firm Dell Orto in 36 mm finish with acceleratorpump, drool, drool, drool. Something like this: |
 |
|
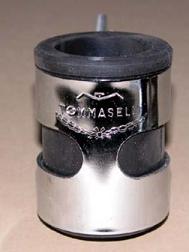
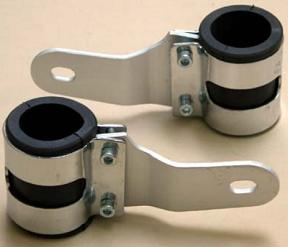
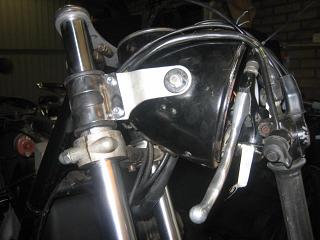
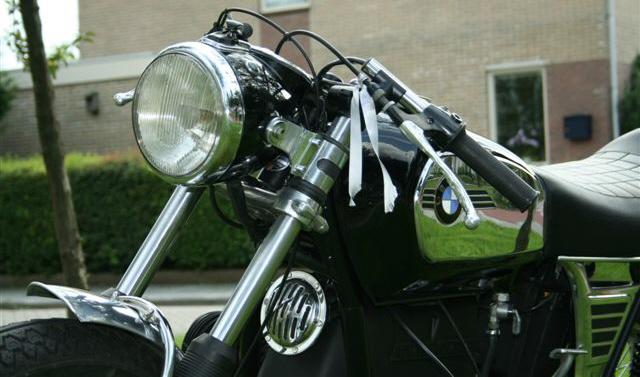
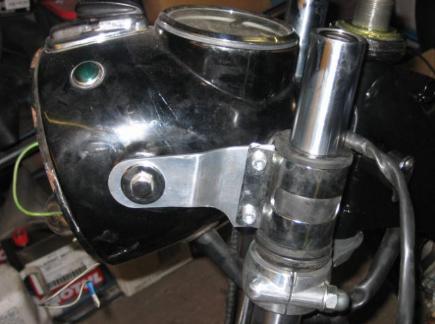
Scored some headlamp-ears from Tommaselli. |
|
|
|
|
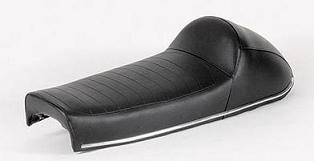
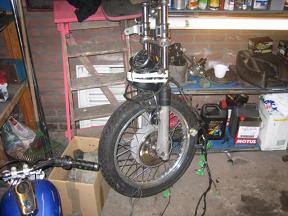
Coming home I mounted them straight on, bit tricky though, as the BMW wanted to tip over constantly. Was not too charmed about that. Removed the harmonica-rubbers from the forklegs and replaced them with the short rubbers, looks already a lot more sporty. Headlamp-ears are mounted, mudguards are removed, indicators and rear-light are removed, so: this way it looks quite a junker. Removed the license-plate and took it away to have a new one made in old blue with a plate for the background, with a chrome rim around it. Just have to wait and see if this answers what I have in mind. The fast camshaft (arbre a cames) of 336 degrees has been ordered at the Hobbyist in Hunsel, just like the sport/race saddle of Giuliari. Can hardly wait until that arrives, am quite curious what this looks like. |
|
|
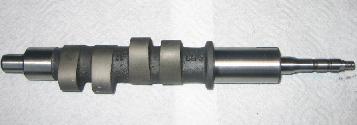
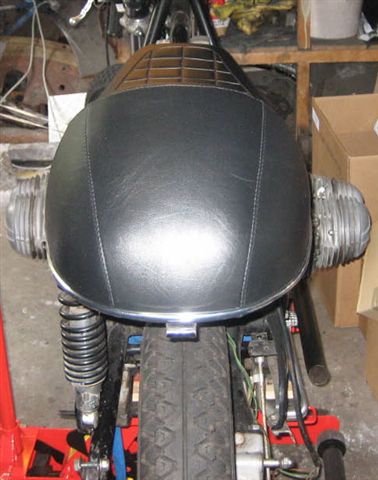
Fast camhaft / 336 degrees: next to it the sportsaddle: |
|
|
|
|
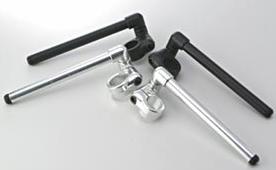
Clip-ons have to arrive as well: |
|
|
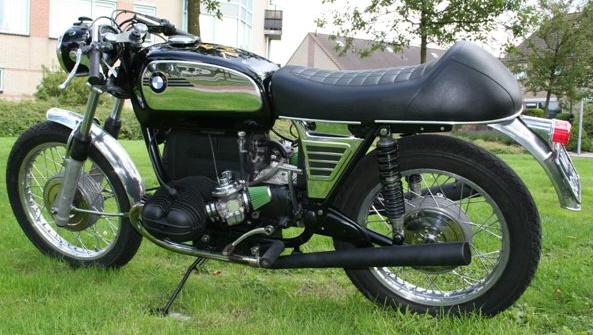
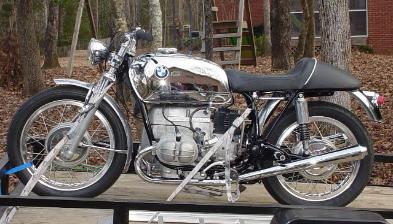
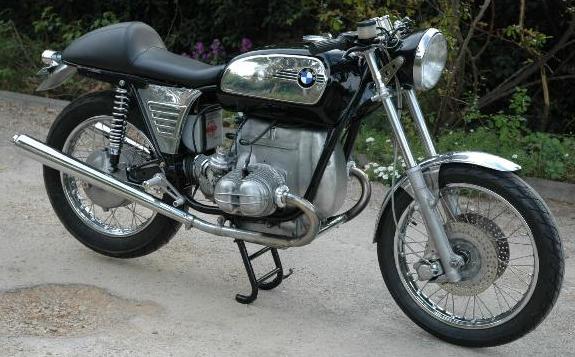
 Another example of a caféracer. |
|
|
|
|
|
|
|
We move on: |

|
It will be a no-nonsence machine with the accent on nonsence. Grim black, with here and there an accent of chrome or polished aluminum. |
|
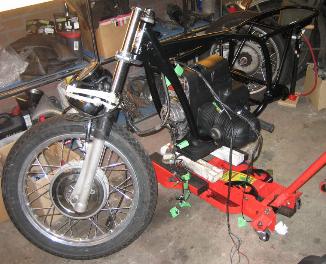
First thing I did was buy myself a decent Harleylift at Powertools in the frisian village of Haulerwijk. Together with a stool that tinkers much more decent and more relaxed. Get going with the exhaust-pipes then. Tube of the balance-pipe was grinded off, fueltank was stripped from useless attributes and can be painted black. Burdened my brother Richard with this, he's real good at it. When the tank gets back, I'll take it to Max Manak for the right Wolf decoration. I trust Max in that. Thinking of making the decoration in gold-leaf, will discuss it with Max. Need to deliver the gearbox at Peter van der Heijden one of these days. There is a small piece of aliminum missing where the clutch cable has to go through, needs to be welded on and then worked on further. |
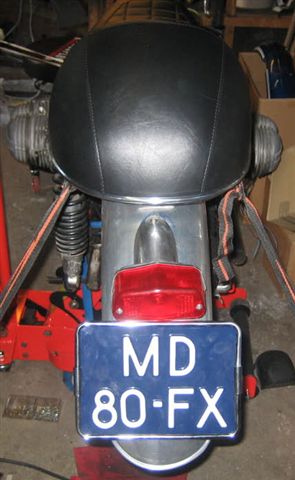
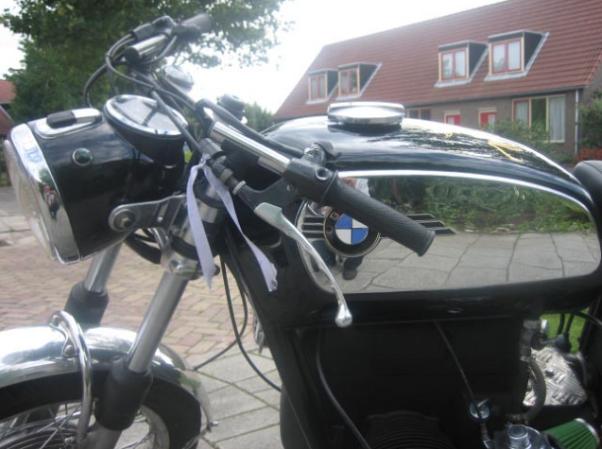
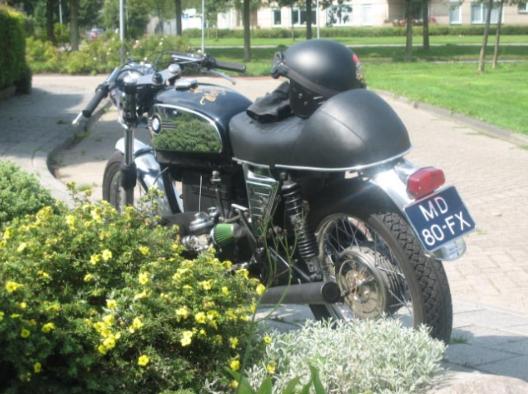
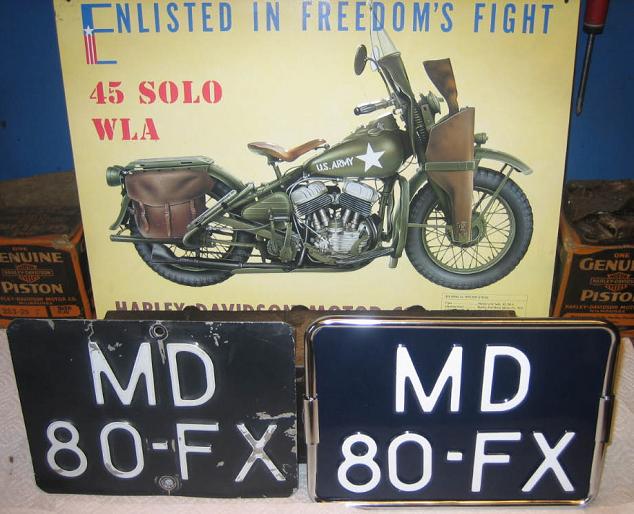 Old and new. Lisenceplate with chromed holder has arrived, looks cool. Pity that I can't paint the plate in black, doesn't matter, this one is illegal as well, there is no plate-mark by authority of the government, so what! |
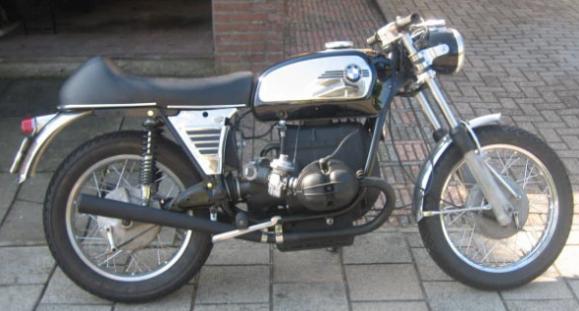
 Found another example on the internet, this one is too shiny for my taste:
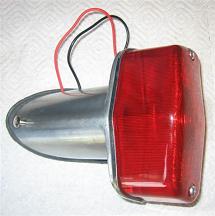
Aluminum mudguards & imitation Lucas rearlight + bracket ar ordered at Peters Classic Bike Parts, will have to wait, can't do anything without the necessary parts.
You'll see that everything will be delivered at the same time. Exhaustpipes are back from Richard, had them nicely welded and has smoothened them, all I need to do is polish and spray them. |
|
It is as if the devil is in it. Got this morning the black-sprayed fueltank back, the crankshaft, saddle and some other small stuff and tonight I got the flysheel back from Erik, Wonderful! Was talking to Erik, that the machine is becoming real mat-black now. Been talking with Hans about this often, no fuss, just a basic machine without any song and dance. Think this way of work is in line with the thoughts and fantasy of Hans. And Yes, the very next day, there the mudguards arrive, together with the rearlight and support. Now there will be no more excuses, not to work on the bike anymore. Lots of work to do. |
|
|
|
|
Better clear all the clutter in the shed and on the bench. It is very cluttered and looks too badly organized to work decently. Started with the front-mudguard, was a bit too long. So quite a piece was grinded off. Short at the front and short at the bottom near the brace. The mudguard at the front is a bit too high, by the radius of the mudguard. Better start experimenting with bushels in between to make an aesthetical sensible look.
Rear mudguard the same. First the licenseplate and holder are mounted and above that, the rearlight. Also with this mudguard, the part that is not seen needs to be cut. Then it seems that aluminum is very tough stuff and hard to work on. |
|
|
|
|
|
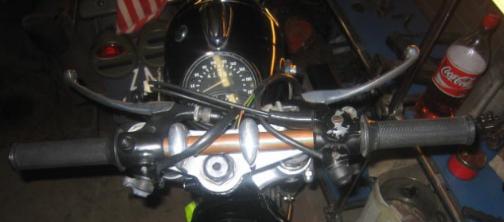
Things get fastened provisional, because the attention goes to the camshaft first. And here comes trouble: 2 allen-screws won't come loose. The first screw breaks immediatly on the inside. It looks like urinal-steel. 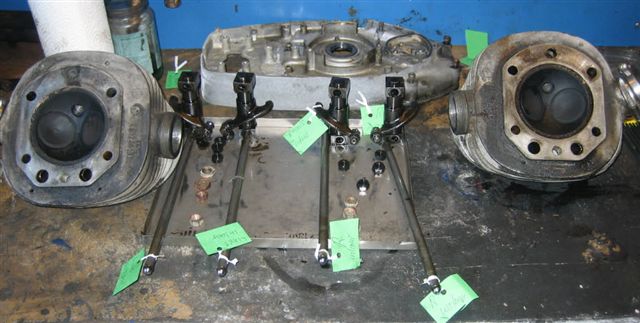 Everything is labeled. |
 Camshaft won't come out (2 bolts are very tight). |
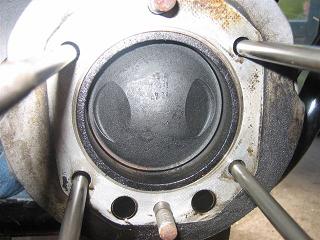 Cylinder and piston look brandnew. |
|
Now I can move on (so I thought). |
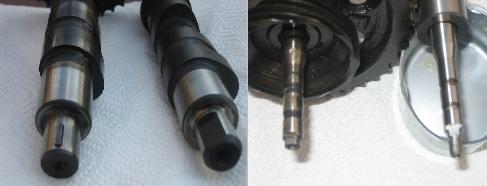 Links de oude nokkenas en rechts de nieuwe. |
|
Alright, like it looks now, the inside rotor of the fuelpump needs to be replaced by a type that belongs to the fast camshaft.
Got another good tip from Erik, to get in touch with the walking BMW-encyclopedia (Richard). This man tells me, that I need to mount a rotor that is of a younger type of BMW and it should fit smoothly.
By now it is July 6 and some more small parts are coming in. Necessary for the engine-block: the right oilpump-rotor, timing-chain with fish-connection, gasket for the timing-cover, suction-rubbers for the carburator/cylinderhead.
Not! There are 2 M6 bolts with the camshaftcover, in order to fasten it. These should be M8. |
|
Another day in july,
Went to see Harm (Harley Harm) for advice for the flywheel and bolt. Just mount it, doesn't seem a problem he thought as well. |
|
|
|
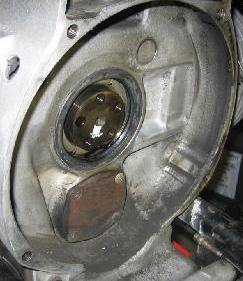
Removal of the 4 bolts of the oilpump. Bolts have now been removed. |
|
|
|
Been away to see Andy for flywheelbolts, but these were no thicker than 10 mm, got another problem there. (those were real German bolts).
Now back to the camshaft again, still doesn't go round freely. The high lobes touch something, don't know yet, where against. |
|
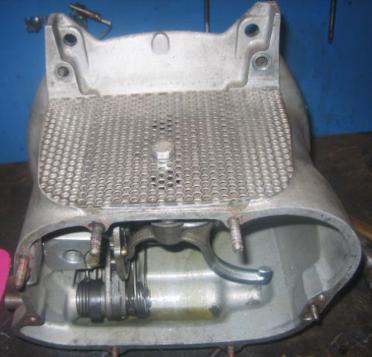
Said it before, the block needs to come out. remove the oil-pan and judge and inspect where that rotten lobe is touching something. I need to know.
Story untill now: Tomorrow there is another day, a short day and from monday work starts again. Shortly: there is a shortage of time. |
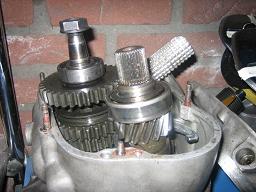
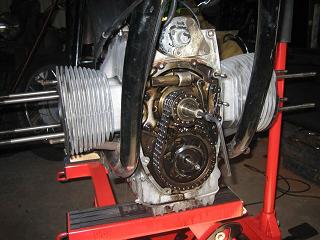
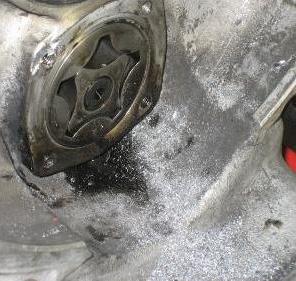
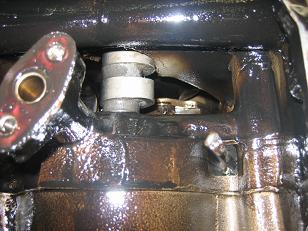 Bottomside engineblock, jammed camshaft-lobe. |
|
After receiving a tip on the forum of the Hobbyist, I took up the file. There was a huge burr on a connecting piece of the cast of the aluminum block. Here the tappet bush comes in and right there, one of the lobes gets stuck. I crammed the block with old clothes to catch the filings and then I filed the roughness away. Finally the camshaft can turn free. |
|
Next step is placing an oil-pan-enlargement-ring, closing up the bottom part of the engine-block, place a new oil-filter in it and place the camshaft-gears on the new axle. This has to be done with great care, the cogged wheel and the propulsion are pressed upon it. It has to be heated up and be dismantled and assembled again underneath a press. The most fragile part is the axle for the ignition. This one is very vulnerable and may absolutely not loose its shape. After that, the timing chain can be mounted and set on time. The oil-pump can get built in and then the right mounting of the fly-wheel. |
 And the bike is disassembled even more. |
|
|
|
|
|
Today I took the new flywheel to Jan Eggens for matching bolts/ or a solution to get the thing mounted on in the right way. He also presses the cogged wheels from the old camshaft on to the new one. These few changes I've done on sunday july 9th. Some had a tour with the bikerforum, I felt the need to get going with the bike. The aim is, not to ride any of my bikes again, until the BMW is riding. |
|
Today (11-07-2006) I've been busy with further dismanteling of the frame. Cables and wires will be loosened from the frame as many as possible. There were needed I hang a lable, then it will be later degreased, sanded down and sprayed in mat-black. I still have my doubts if I should grind down part of the side of the back-end of the frame. Could be more graceful, but should not become too weak, because of the bending of the rear-frame. Just made a picture of the garage-door, this one slowly gets overgrown by the hedge. A good excuse, not to go out biking with the other bikers. Can't open the door anyhow, the BMW has to be ready first. I really push myself to that, so I keep working on it. |
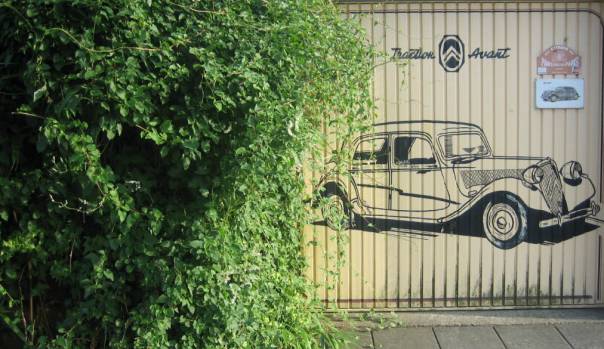 Garagedoor will not open again, until the bike is ready and in good running order. |
|
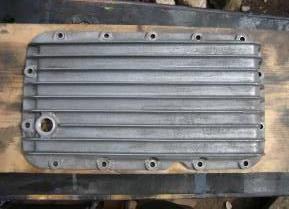
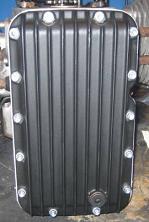
Oil-pan enlargement-ring has arrived and is mounted. Am I finally getting on? (13-07-’06) |
|
|
|
|
|
|
|
Have the frame powdercoated, I'm sanding it down like crazy. Everywhere I run into synthetic paint, that dissolves in thinner, can't paint it with a spraycan anyway. Just checking my aquaintances, as to who can make this black. Today is already July 17. Got the flywheel back with the adjusted bolts, fits perfect now. Cogged wheel of the camshaft is pressed over and can finally be mounted on. |
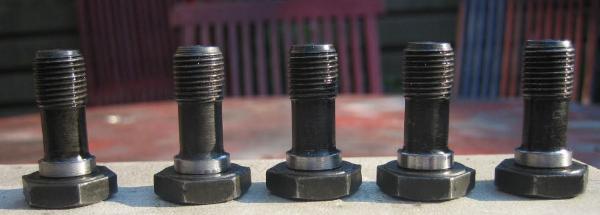 Adjusted flywheel-bolts with bushes from 10 mm > 11 mm. |
|
Borrowed some special equipment from JanBMW, to get the steering-head-bearing-cups out, now it's a piece of cake. I also got the cover-equipment because of the powder-coating, for those places here there shouldn't be any coating. All screw-thread-openings are closed by turning an old bolt in. Camshaft is mounted and the chain is on. The camshaft turns nicely, but now the chain won't. Want the master link to be mounted from the back, with the "fish" on the outside, doesn't work, the shackle is too long and can't get the chain on this way. Can be done the other way, with the "fish" on the back side, better try it. And it works, checked it with a tiny mirror if the "fish" has been properly mounted. The flywheel is next, tightened the bolts and immediatly the flywheel is stuck as firm as a rock. Won't absolutely turn free, what is this? Tried to mount the original flywheel, same result, just don't understand a bit of what's going on. Check the forum of the Hobbyist. There should be a spacer-ring, that should lie loose. I see two holes that should move over two pins, Eureka! It turns, mounted the clutch disc and the pressure plate in the same process. Now it starts looking like something again. In my thoughts I can hear it running again. This is how I struggle on. Having a beer and I sway on my legs. Hardly ever drink, but now with 30 degrees Celsius this cold beer really kicks in. |
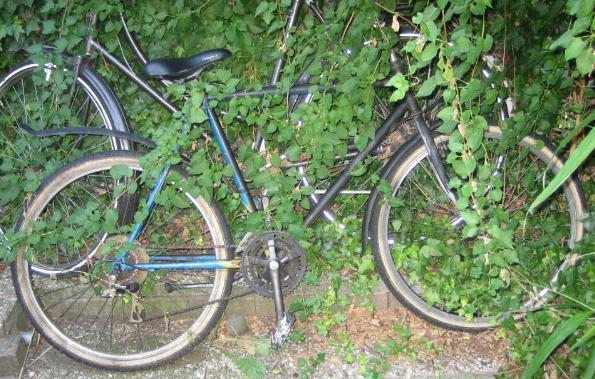 My bicycle, is very intensively used, NOT. |
Thursday, July 20 already. Just took the frame and some minor parts to Trudy, she will take them to Rene, who will see to it that it gets powdercoated.
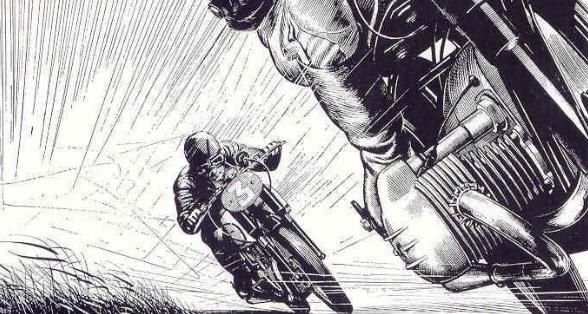 Nice picture of Oldtimer (Oldtimer, thanks for it)
Because of the holidays, the frame will be back as soon as possible, but I may have to wait for the minor parts for 2 or 3 weeks. This afternoon, July 22, I go on rebuilding the engine-block. I've mounted the timing cover, with obviously new oil seal-rings. Cylinderheads have been cleaned, valve-adjustment has been adjusted again and the valve-cover is mounted.
Can hardly wait to spray it all in mat black, but I will have to be patient a bit longer. |
|
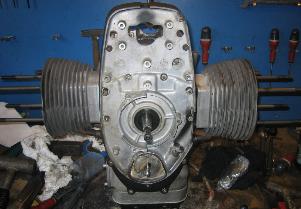 Before. |
 During. |
|
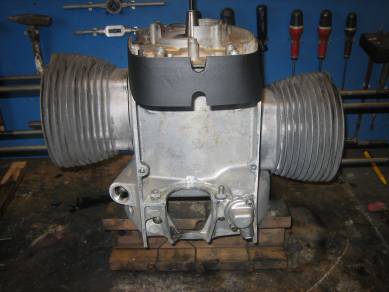
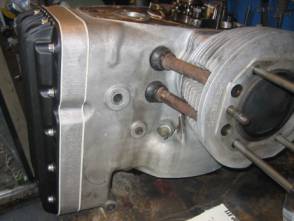
I'm up at 06.00, first have a go on the computer and at 08.00 I'm in the shed again, busy degreasing, cutting away the sealant-remains and spraying the engine-block. |
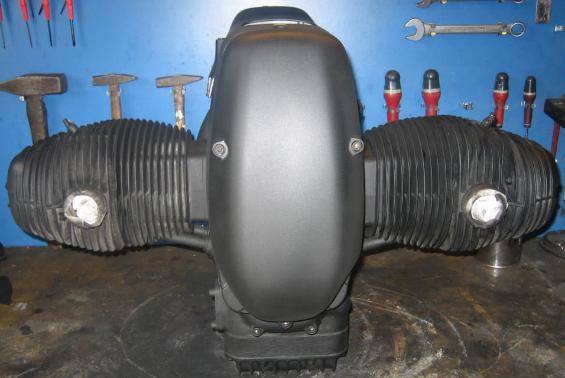 Ready!!! |
|
At 09.00 the engine-block is mat-black, cool, super, this will give a new dimension to riding BMW. The sound character is gone now, looks nicely gloomy black and quite sober. I must be crazy, but who cares, I'm not going to sell the bike ever. Let everyone else polish the bike, it's not my cup of tea. |
|
|
Can pick up the frame and minor parts at Rene, this is a very fast delivery service. Friday, Trudy took it there, on monday it was blasted and painted, tuesday ready to be picked up again. Looks like new again. |
|
|
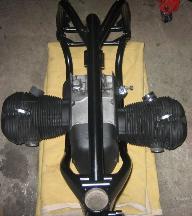
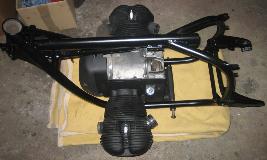
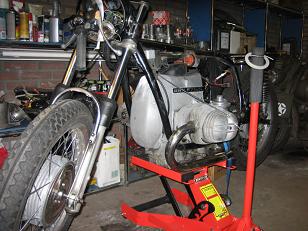
Reconstruction can finally begin, first want to make a test placing and hang the engine block in it. The imprint of the colling fins is still visible on my arm the next day, but that will fade away. |
|
|
It is still sweltering hot in the shed, but it will cool down this weekend. From sathurday-afternoon on, I will make a serious attmpt and fasten the frame and engineblock to the Harley lift. Trudy passed by to see how it had turned out and immediatly became emotional. Boys: it's only 2 months since Hans has gone, this isn't going to be easy. You just feel for yourself, that this isn't going to work. Hans is not helping out, Hans doesn't see what I'm building in his memory. Hans: it is in your style, rest assured, it will all end well. Then the tears come again spontaniously, f*ck!!!!!!!!! Technically it is all going to work, I'm not afraid of that, but emotionally this is going to be a very tough job. |
|
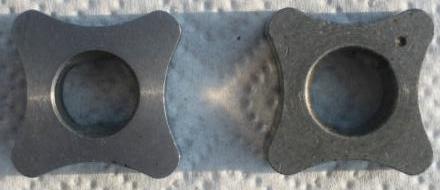
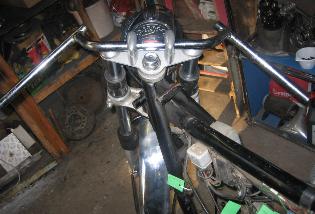
Today I had the pleasure to receive the upper plate for the steering-head-triple-clamp from Jan, made of stainless steel. Obviously the 4 holes are missing, where normally the steering-rod is fastened. I don't need those holes anyway, because I will use clipons. It fits perfectly (compliments to the artist and Jan thanks for thinking along and the delivery). |
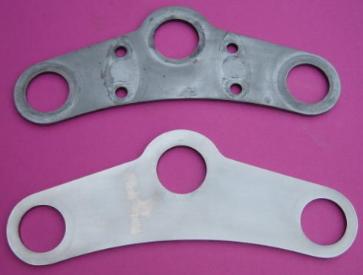 The upper is original, the lower, the stainless steel. |
|
Have to polish again as if there was nothing to polish. I'd better get a move on, because my vacation has started (another 4 hours to work) and I really would like to get the bike ready for the biggest part. I certainly want to have it running, I'm very curious about that. I've started to fasten serveral parts. Most parts will be mounted with stainless steel bolts, this gives a few subtle points of interest. |
 Manually polishing of the aluminum front-mudguard. |
 Nice sticker, will put that on too. |
|
Haven't made up my mind as where to put the sticker (mooi nie 'n Japanner nie). I will work that out, when the bike is finished. I will find a nice striking place for it. Polishing of the lower steering-head-triple-clamp of the front forks is of a disappointing character. What a lousy job, but when finished, it is beautiful. |
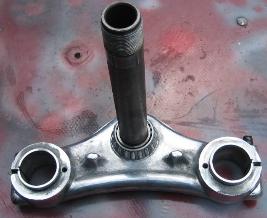 Lower steering-head-triple-clamp. |
|
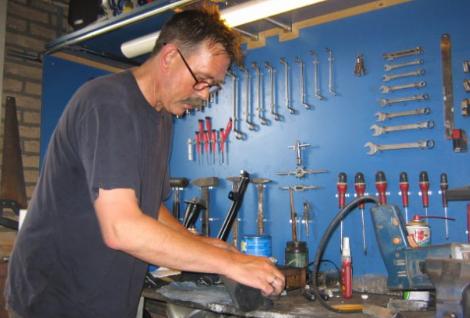
Today, July 29, Donald and Harm visit me. Donald is a Triumph-freak and Harm is Harley Davidson infected.
Both gentlemen had a look at the bike and according to me, the were positive about it, it will do. |
 Obviously overheated example. |
 Start assembling. |
|
Wish I could mount the rear fork. I'm already waiting for 2 simple seal rings for a week, that can't seem to find my house. I'll give them a call on monday, this way I can't carry on. Tonight I had dinner at Trudy's, don't feel comfortable. See Hans everywhere and look at the items that he has touched, a strange feeling comes over me. My wife calls Trudy and gets the voicemail. Hans tells that they are not there, it plays in my mind all the time. Hans played a mayor roll in a large part in my life.
Sunday again, I wake up early, even though it's my vacation. At 06.30 I'm out of bed. Get cracking with the BMW I think, hurry, why? I haven't got the faintest idea. |
 Headlight-ears are nicely polished, rotten job. Well, because I have to wait for minor parts to arrive, I might as well start polishing, connect the wires, mount a mudguard, clean minor parts and spray them black. 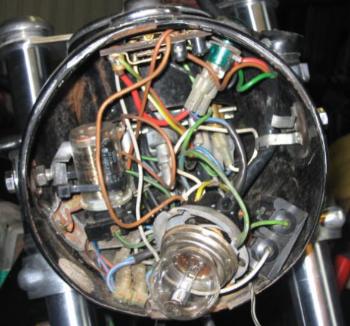 It's all very vague. |
|
Now I'd better watch out, it is nearly finished. Want to mount the battery, just to see if the engine rotates properly, I'd better wait another while. |
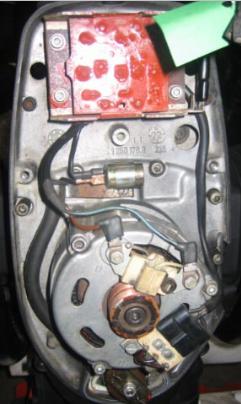 Red-lead is on it for 20 years. |
|
I just mount the mudguard on it loosely, because the rear fork and the wheel need to go in first. Can't check if the mudguard is straight. |
 Hedera helix grows inside.  "Wedding veil" grows into the garage as well. |
|
Alyanne comes back from vacation in Italy today and she brings something suitable: Harley Davidson wall-decoration. I hardly recognise her, she has become a very brown daughter. |
 This is a must on the wall for the harley-fanatics |
|
Tuesday, August 1 already, early awoken. I'm awake at 03.30 and decide to stay in bed for another while.
The secondhand gearbox gives me a problem, the cable of the spedometer is seated in a bushel and is kept in place by an M6 bolt, which is also the connection for the ground cable.
Today I will concentrate on adjusting and fitting the new aluminum mudguard. Yesterday I've cut it with a grinder, because it was stuck on the rear fork. |
 Swingarm and cardan mounted. |
|
The rear wheel can finally be assembled, has to, otherwise I can't see if the mudguard is straight. It has to be in line with the 400 x 18 rear tyre. |
 |
|
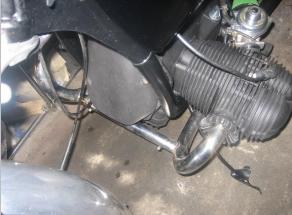
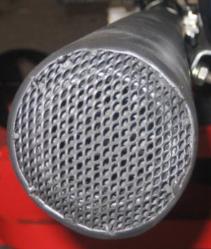
Better get cracking with the exhaust mufflers. On of them already has the anti-police-look-in-gauze already on it. Still need it solded or welded on though and then it can be sprayed in black. |
|
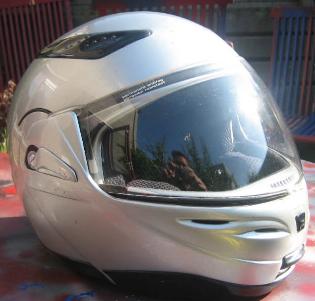
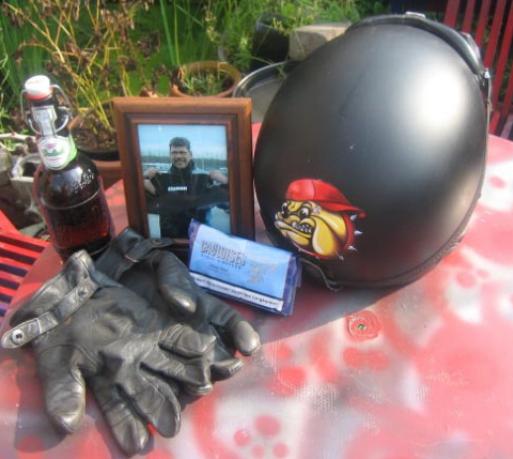
Thursday, August 3, Today I stopped by the Franke-Boys. Franke was so friendly to weld the gauze. Just need to file off the burr and it can be sprayed. The exhausts will be ready then. Because I'm still waiting for certain parts, I've started to get the helmet sorted. That shoudl become black as well, easy as pie and done in no time at all. |
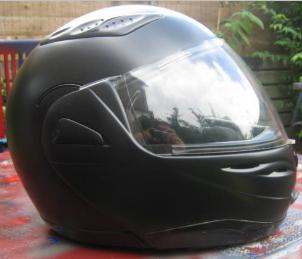 Helmet, also in de colour of the bike. |
|
I disassemble the clutch-handle, sand down all the paint, ready for spraying. |
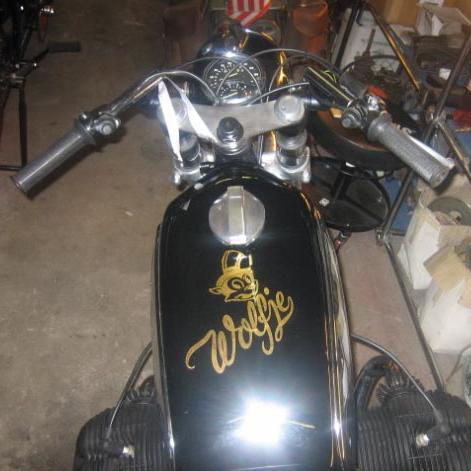
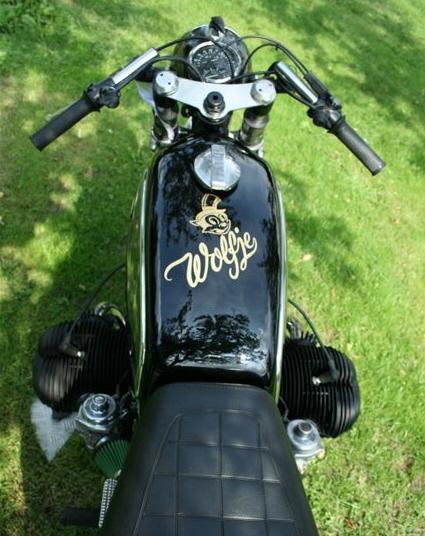
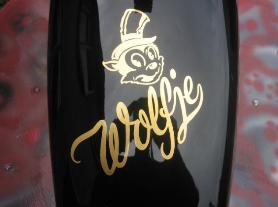 Tank has become beautiful, |
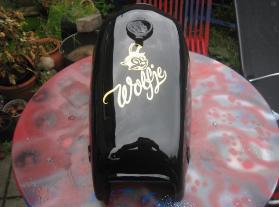 Max, Well done…!!!! |
|
It is meant to be a "Wolf in sheepsclothes", also because the engine had some technical changes. Explain it to someone, is hard, it is only in my mind. Friday, August 4,
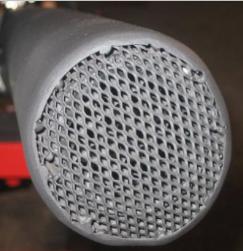
First I will assemble the helmet and after that I will work on the mufflers.
Grind away the burrs and spray it black once more. |
 Gauche |
 Droite |
|
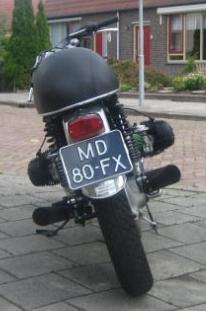
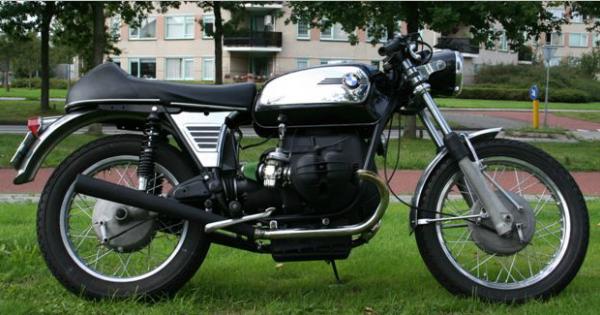
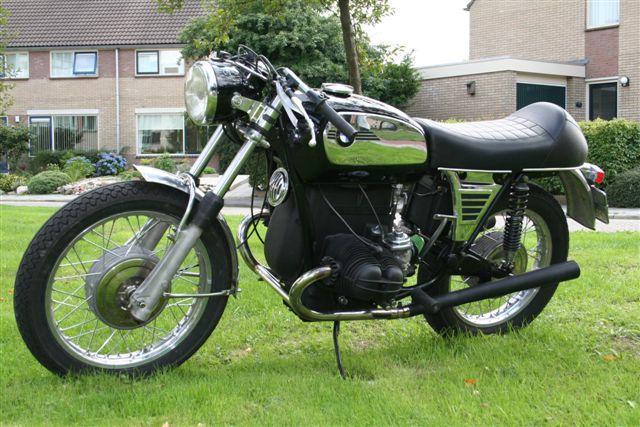
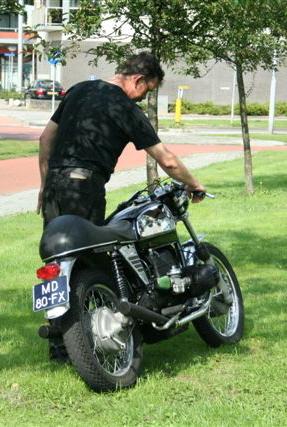
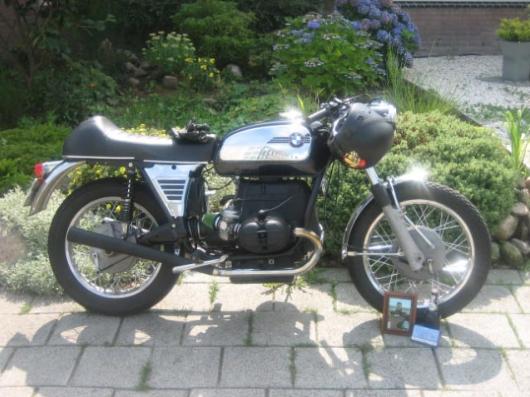
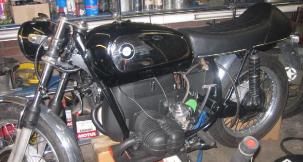
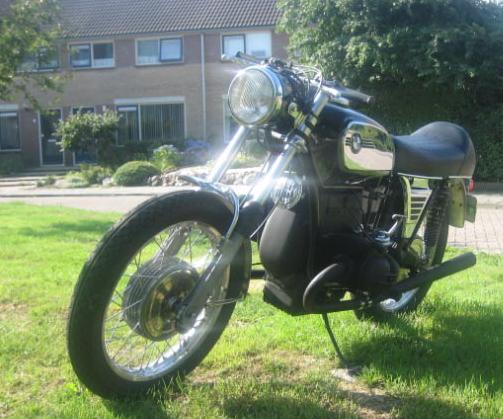
Saturday, August 5. Wolfje can go outside today, I need to try her, just a bit. Make some pictures of what she looks like so far. |
 The change-over is better visible. |
 Original. |
|
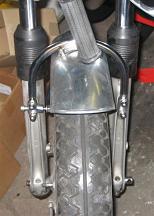
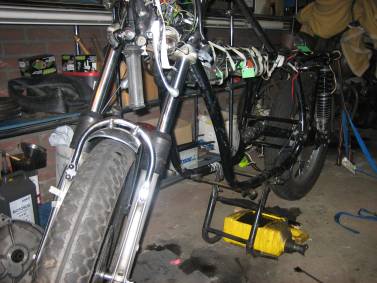
Wolfje went outside, not exactly to her liking, Didn't run smooth, no more front-suspension, steering was a disaster with the emergency-steering-rod of only 30 cm of copper-tube. |
 Day & night difference. |
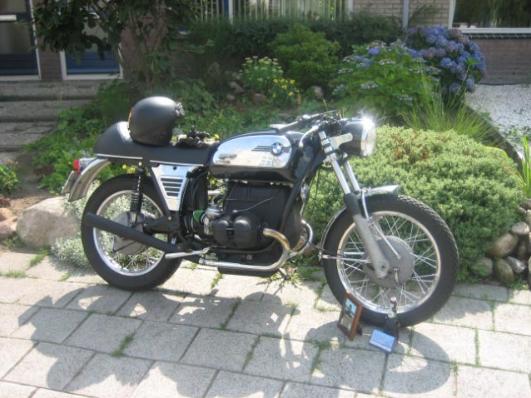
 Think she looks quite neat and elegant. |
 Obviously the other side as well. |
 The example from the Internet. |
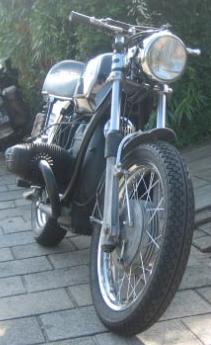 Front |
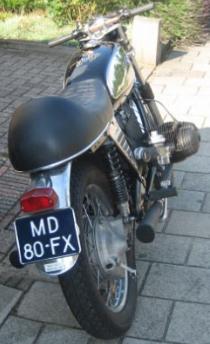 Back |
 In the sun. |
 With Hans his house in the background. |
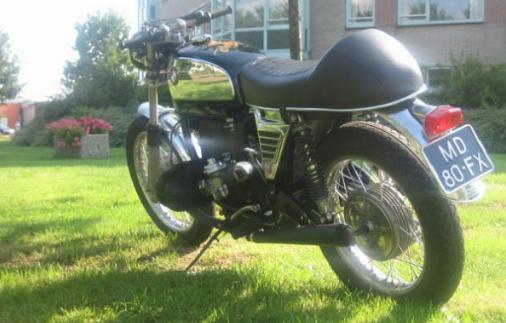 Looking pretty. |
 The already widely-known plumbers-steering-rod. |
|
She's not finished yet obviously. There are serveral things that need some more attention, like the finishing of the hole where the airfilterhousing used to be. There has been an attempt to finish it off by a very touch plate with an uncountable number of holes in it. Even the grinder has problems cutting through. |
 First made a template out of cardboard. Sunday, August 6, 2006 And now?
I've mad a start with the tuning of the engine, in the first placeI did the synchronising provisional.
Kept open house here today. JanBMW dropped by to give his approval to the whole picture. Had just left, or Erik GS dropped by on his Beemer. He was also satisfied about the whole picture.
Did discuss the problems of the revs i the higher region, probably needs a larger jet-size and possibly later some different carburators as well. Also Herman and Chanella have seen her today. Chanella wondered, if the exhaust-sound was legal. Monday, August 7, 2006.
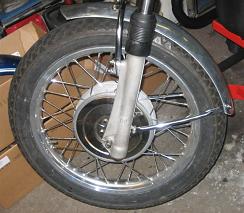
Had a test-drive here in the area, won't be leaving town, because of leakage of oil from the right frontleg. The seal is broken.
Hoemward again, suddenly an enormous shower with hail, lighning and I don't know what. So I find shelter at the Shell service-station. Now I am sure I'm on the right track, just positive reactions. The bike is only modified, not raped or something. I'd better keep myself occupied with that rotten little steering-rod and see that I get her running better in the higher rev-region. Tuesday, August 8, 2006.
First I have to replace a rear wheel bearing of a Gilera Citta, nice and simple that is. |
|
|
|
|
The pointer of the tachometer almost goes round. I love to see that and the power has become better along the whole range. During the test-drives, I do miss my mirrors. Constantly I have to look over my shoulder if there is no police car that want me to stop, because they like the bike so much (or would it have to do with the sound?).
© 2006-2016 Webdesign by Betty Smit. |